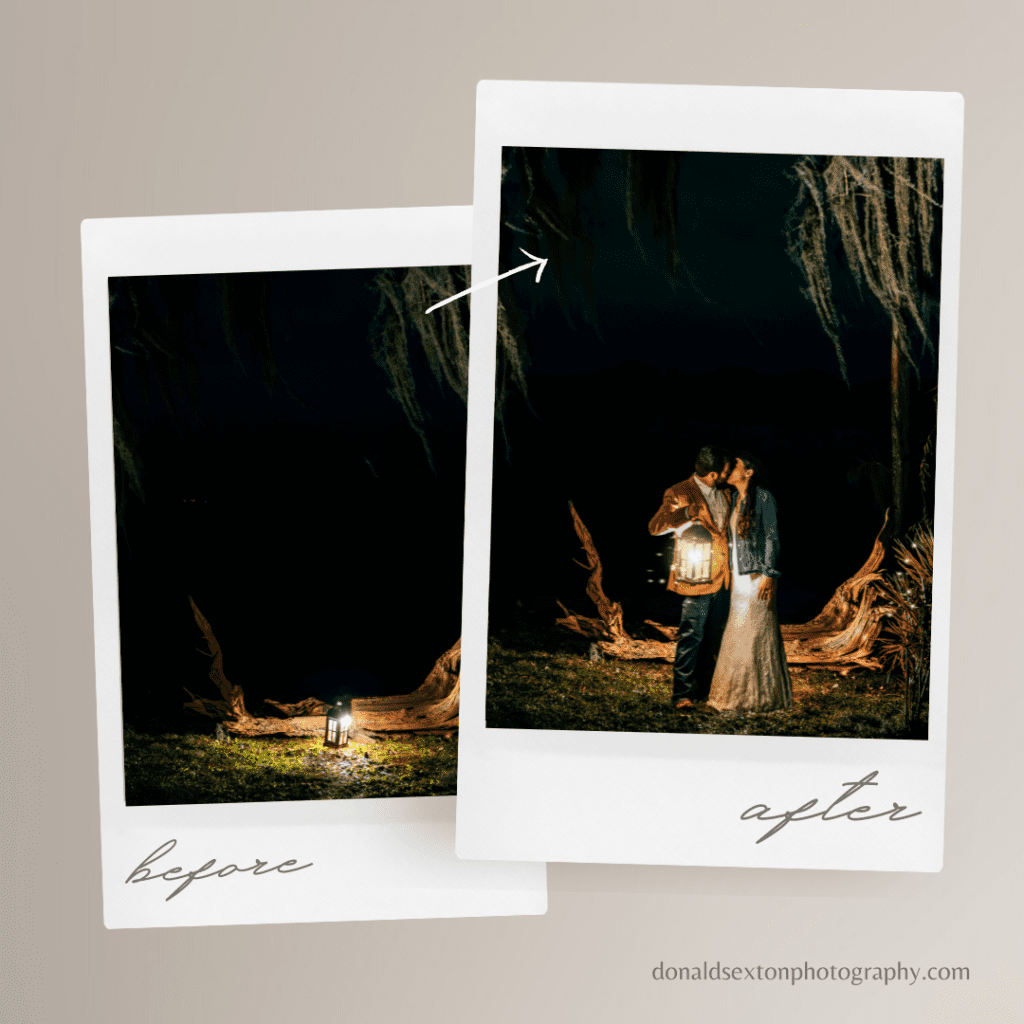
A composite image is an image created from two or more images. The below photo is just a sampling and does not apply to every composite image. However, I wanted to show the editing process, specifically how detailed and time-consuming it can be. I believe it helps brides to understand what they are investing in when they hire a qualified and experienced photographer. It also helps explain why it may take time (typically between 4-6 weeks) for a gallery to become available.
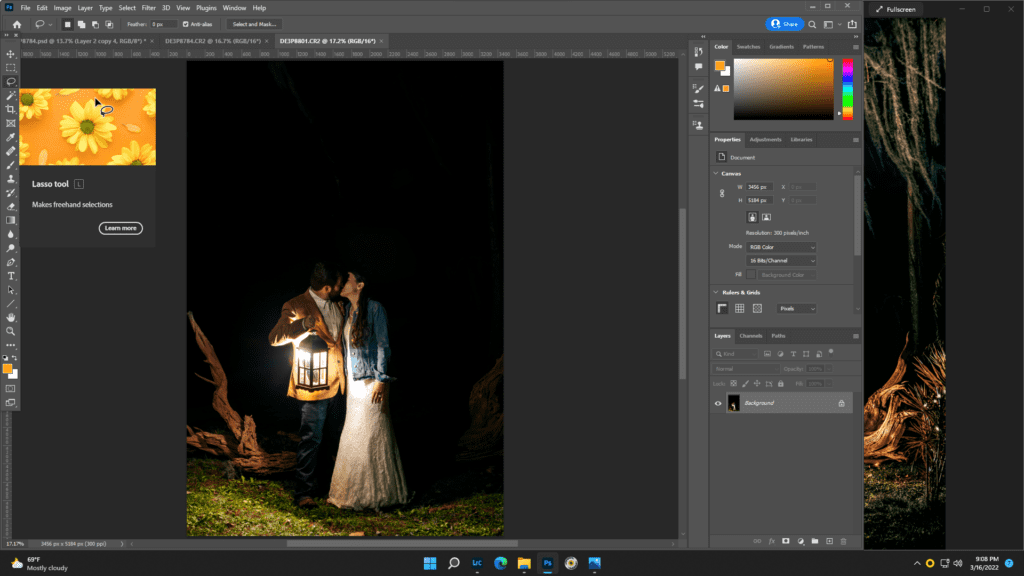
The below image was edited in Photoshop and screenshots were provided to show the given settings and tools (for any photographer friends reading this).
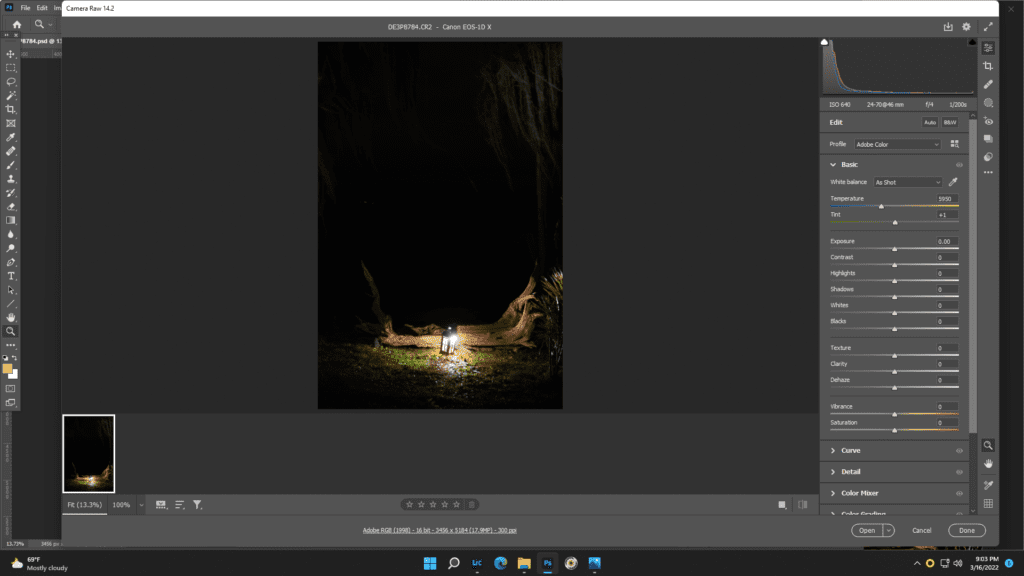
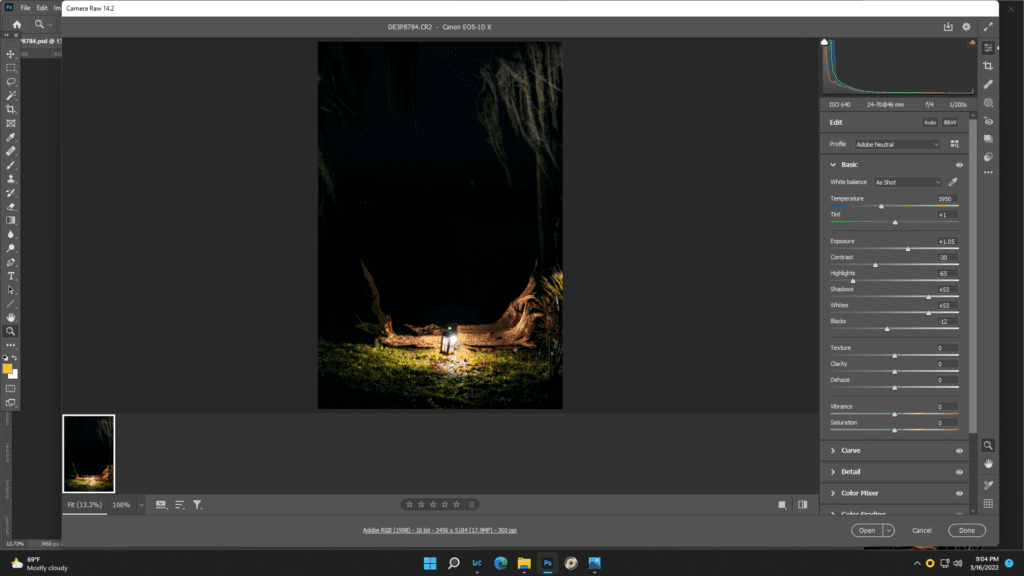
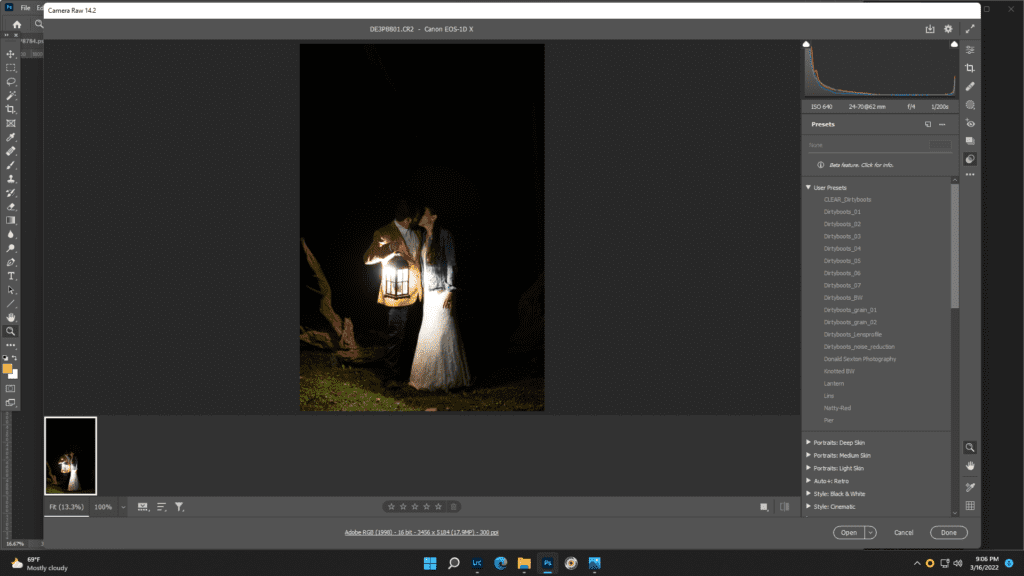
- Start with 2 (or more) separate images – likely taken from the same location. In this photo, I placed the lantern on the ground to allow for proper lighting of the foliage and driftwood. The same lantern was later held by the couple (in what would become the final image). You will see that the two images were edited (utilizing a preset) to ensure that both images consisted of the same settings. I also made general adjustments to account for proper lighting and contrast (utilizing the sidebar – exposure, highlights, shadows, etc.).

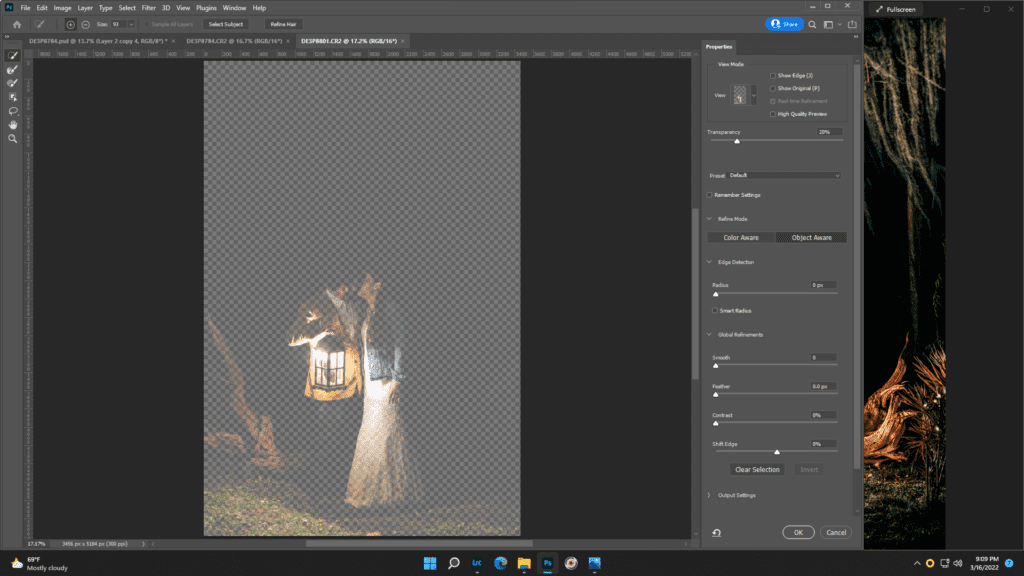
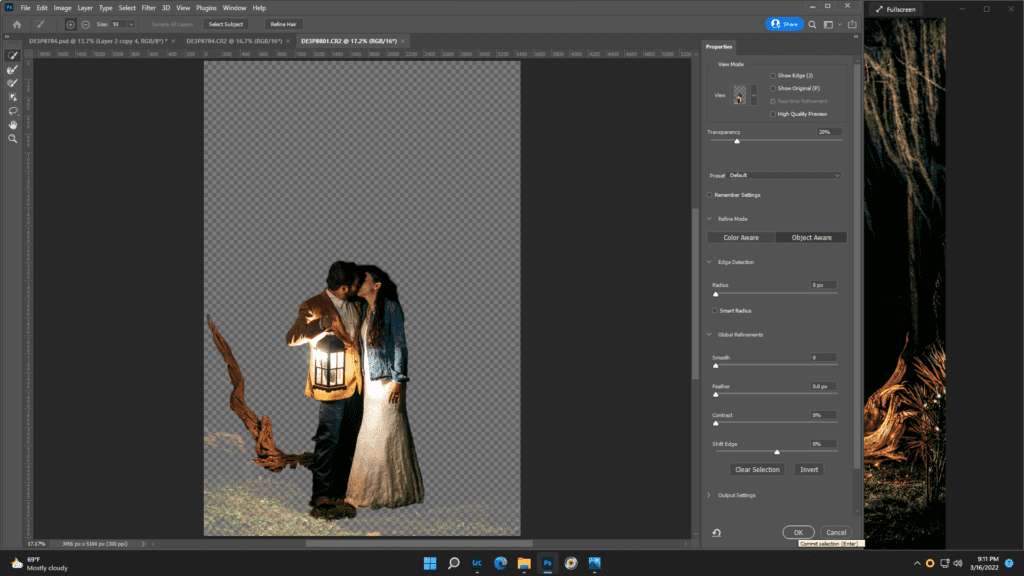
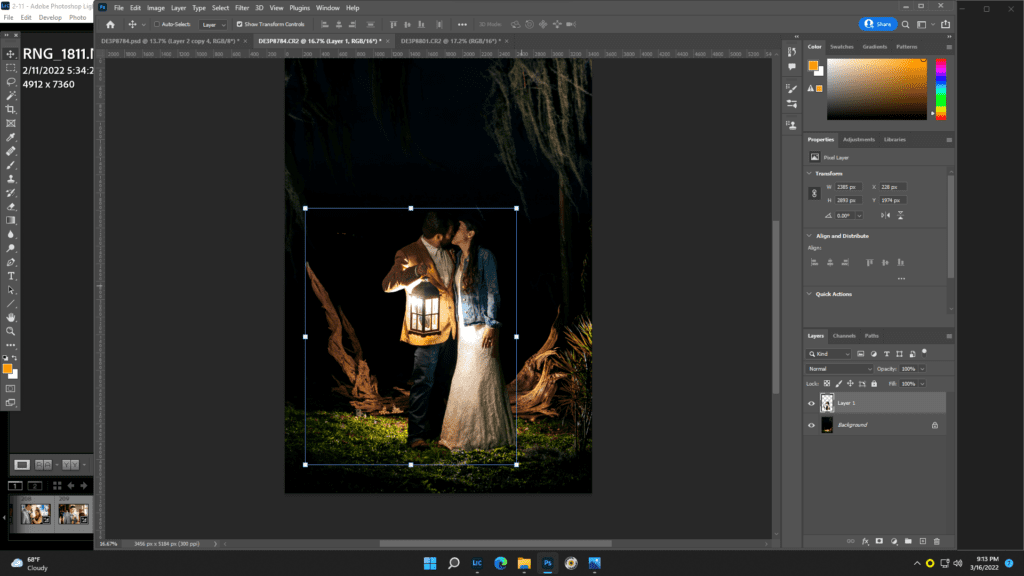
2. Utilize the lasso tool to select the portion of the image you wish to transpose. In this case, we are selecting the subject (i.e. the couple) to move them to the image containing the properly lit foliage/driftwood.
3. Click “Select subject” and, as seen below, photoshop will highlight the subject contained in the photo. Don’t worry if other items (such as the driftwood) are selected with your subject, as there is a step (6) during which I explain how to mask the image to get rid of any unnecessary items.
4. Drag the selected subject, utilizing the “Move” tool, to the secondary image.
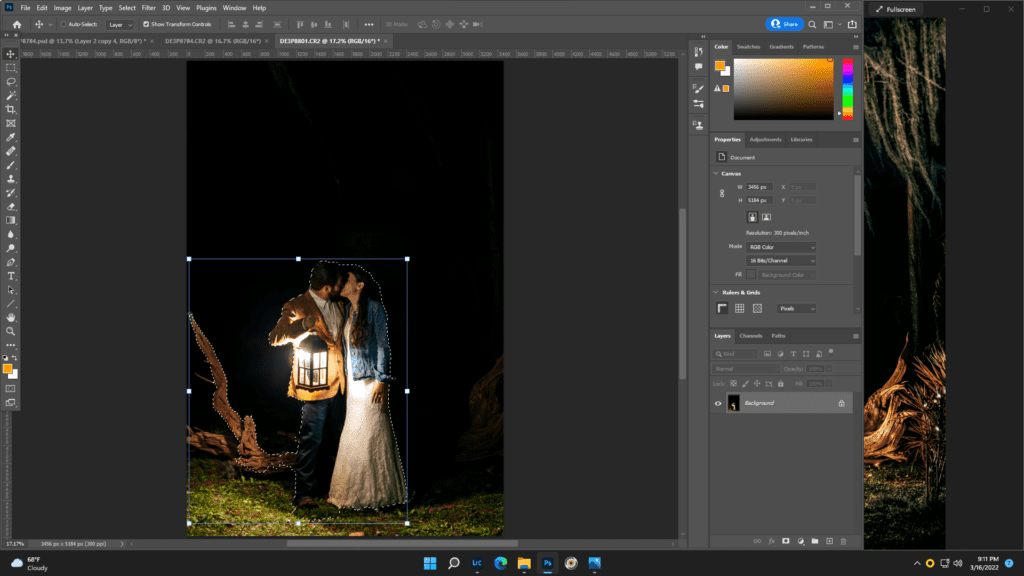
5. Resize the selected image to ensure proper scale on the photo.
6. To get rid of any unnecessary or unwanted items, create a layer mask. Hit “B” for the brush tool and select “layer mask.” You then can “paint out” any imperfections, such as the driftwood.
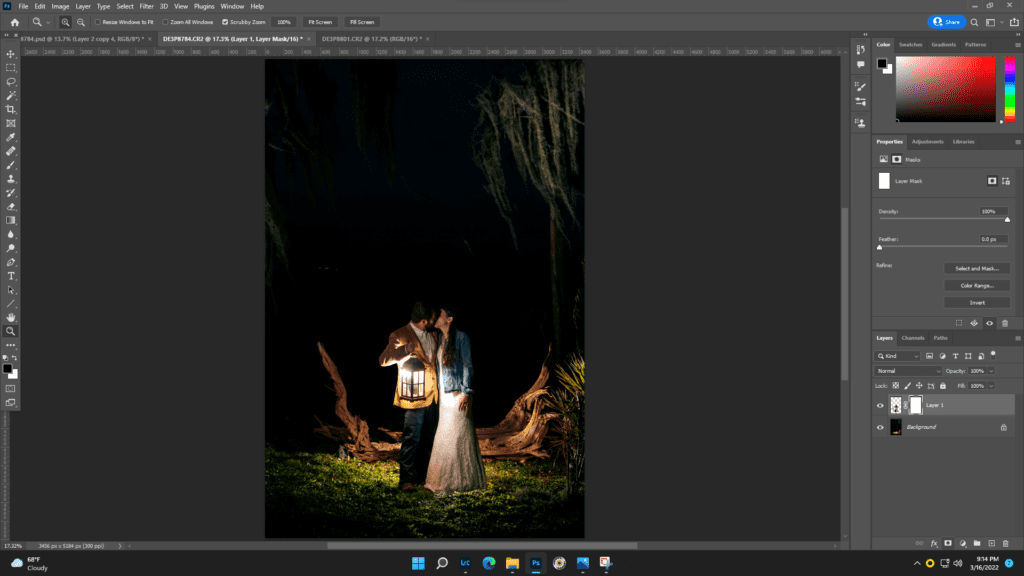
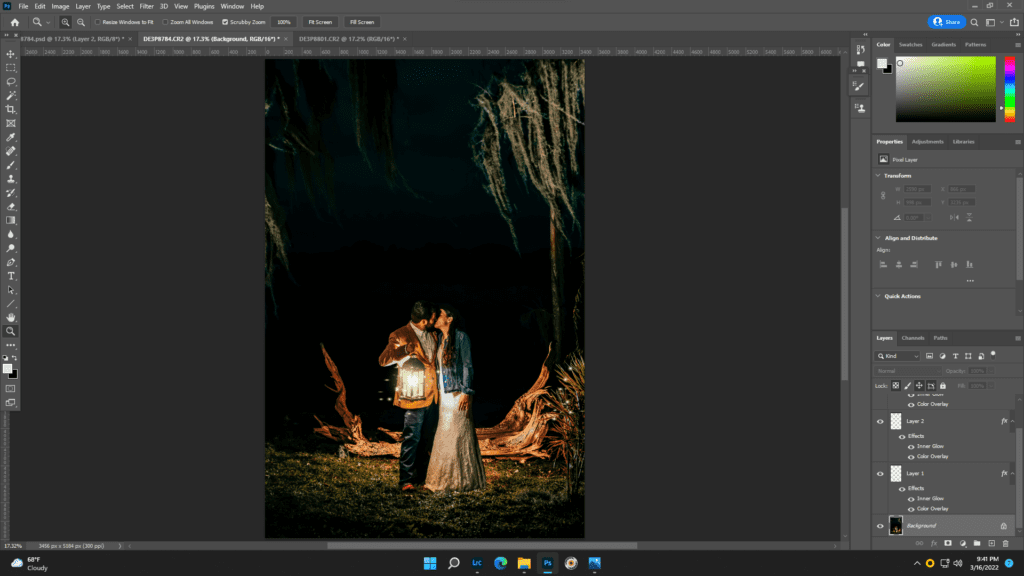
7. Select both layers and hit Ctrl E to create one layer (or merge the two layers).
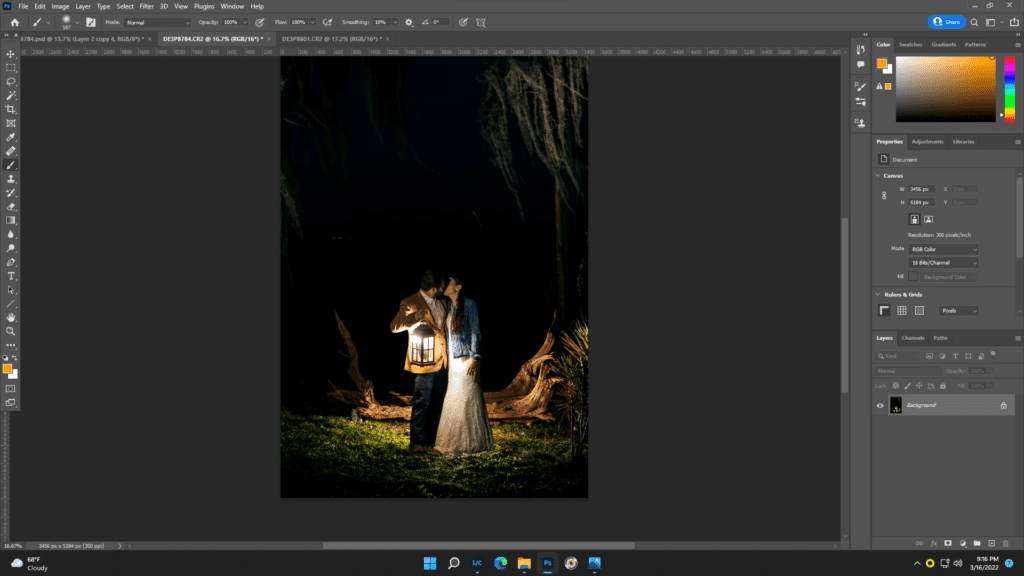
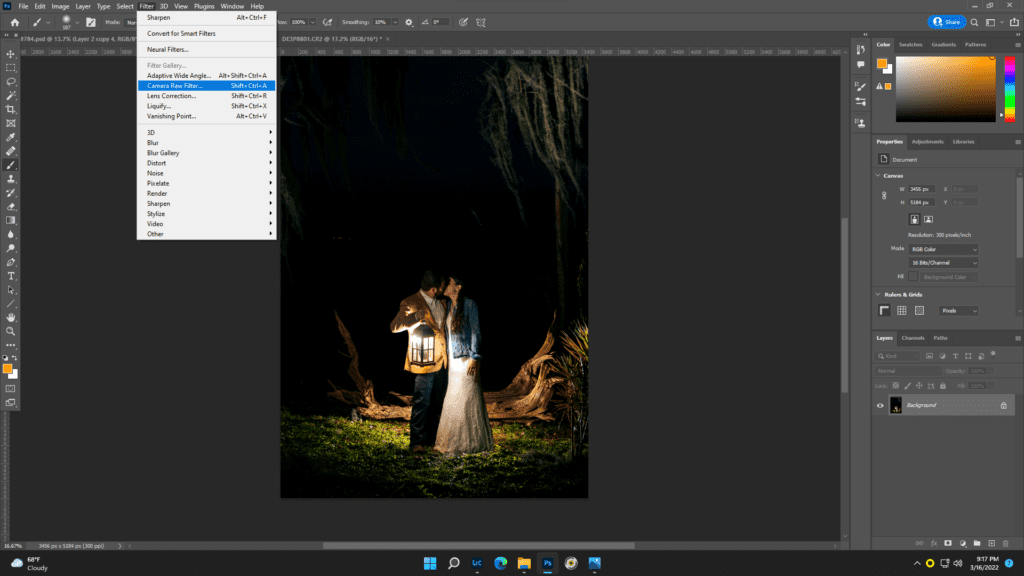
8. Select Filter, then, Camera Raw Filter to apply additional adjustments (i.e. filters).
9. As you can see in this image, my camera flash was utilized to create the light in the lantern (as traditional candles will not create enough lighting in dark settings). No one wants to see the actual flash in the photo, so the next couple of steps were created to get rid of the flash. Here, I zoomed in on the image and hit “B” for the brush tool, then “D” for default, and then “X” for white.
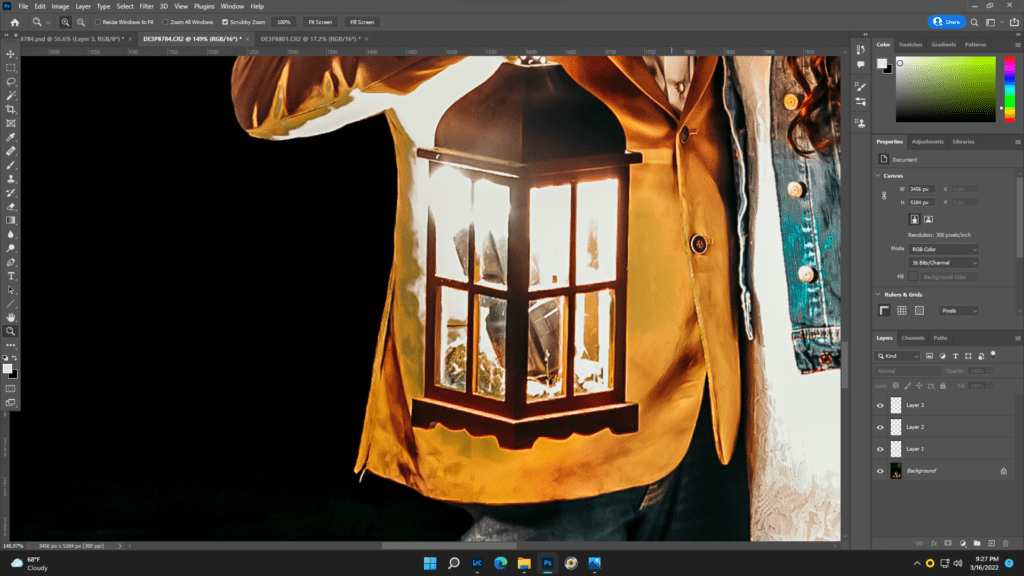
10. Then I painted the layer utilizing the brush tool. I made the brush small enough to paint within the glass panels.
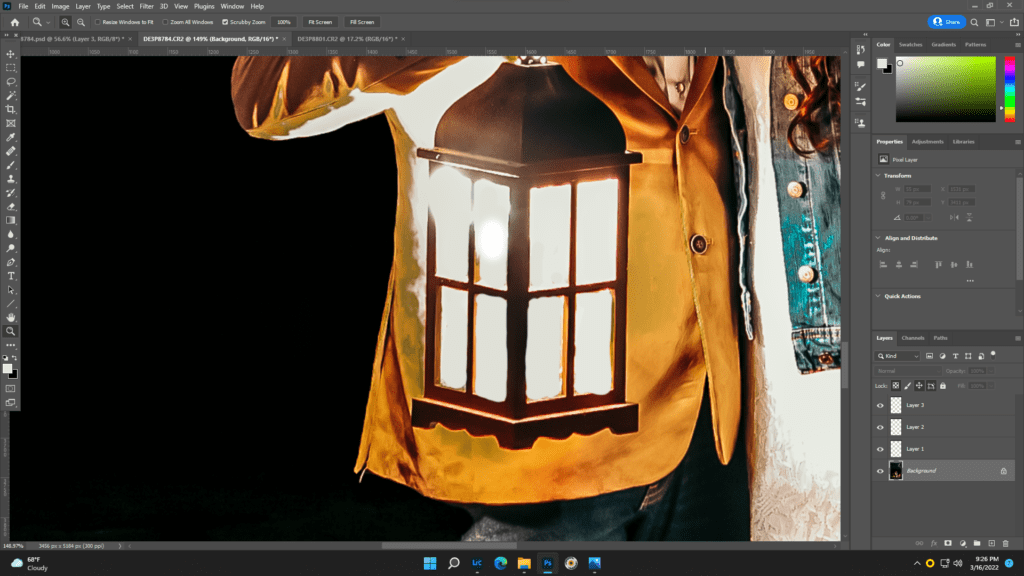
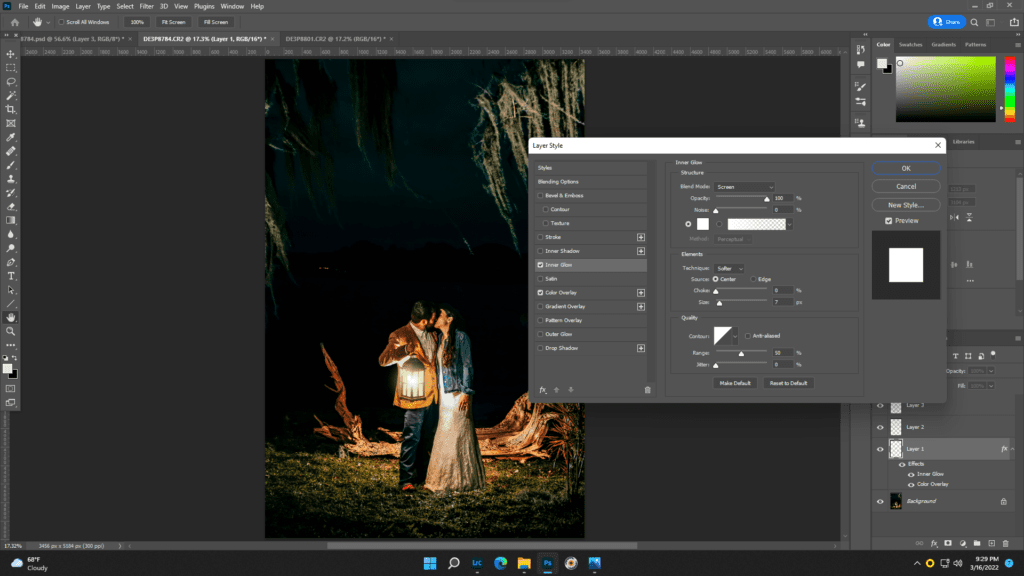
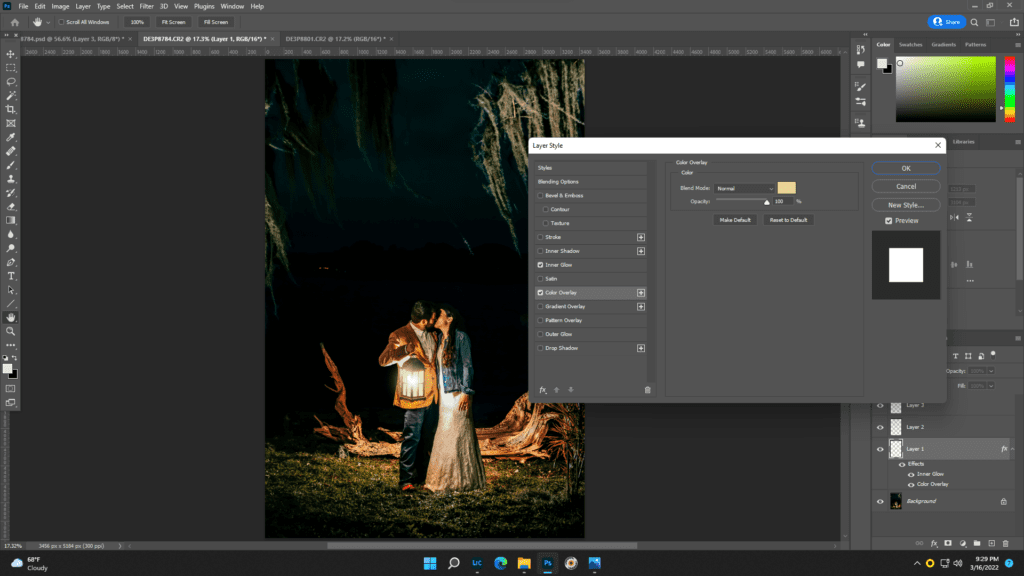
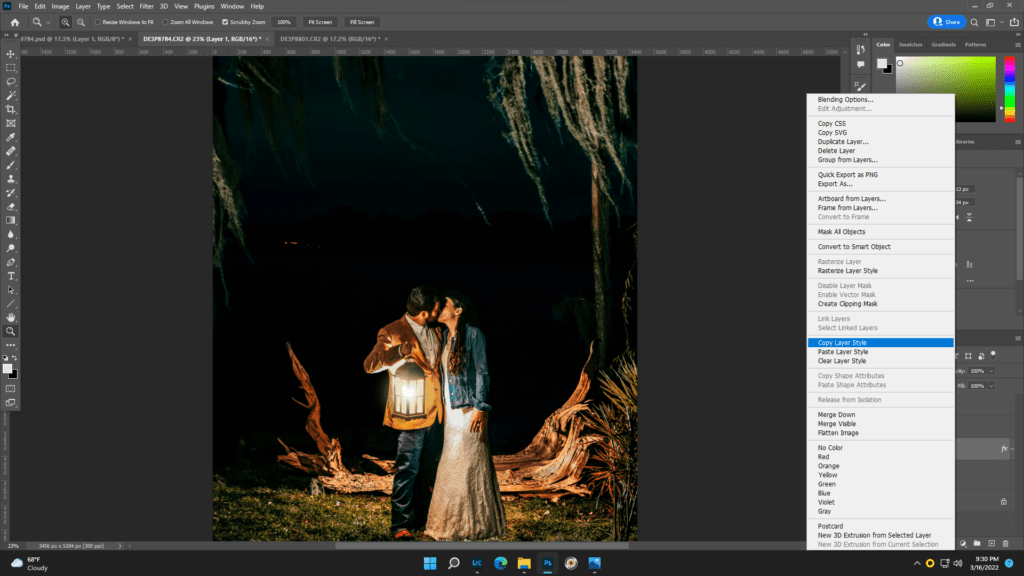
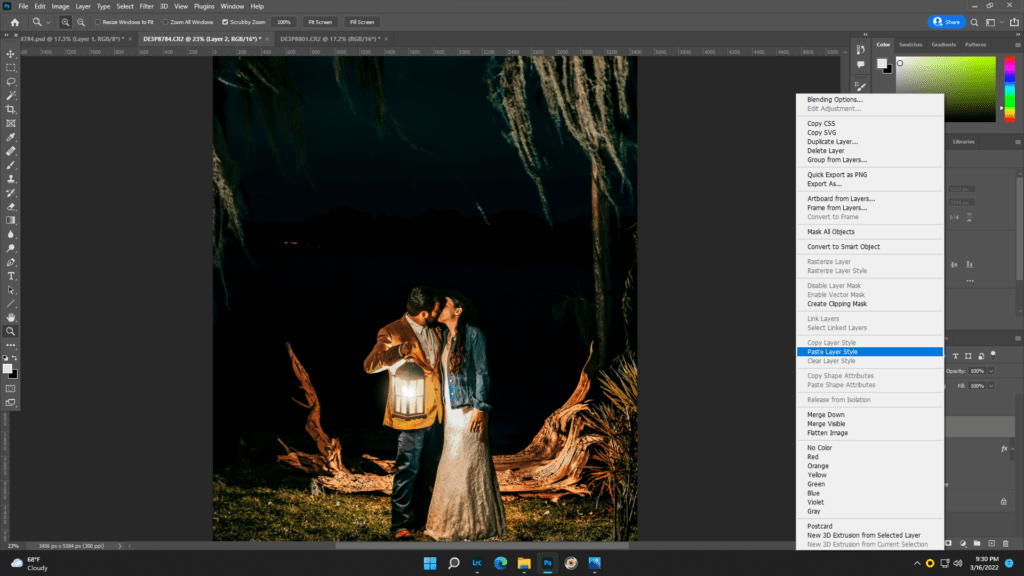
11. I then took a second brush and made the brush large enough to cover the lantern. I then double clicked the layer and selected “inner glow” and “color overlay” (creating the glow in the lantern).
12. I then right clicked the image and selected “Copy Layer Style” and pasted the style to the other two layers.
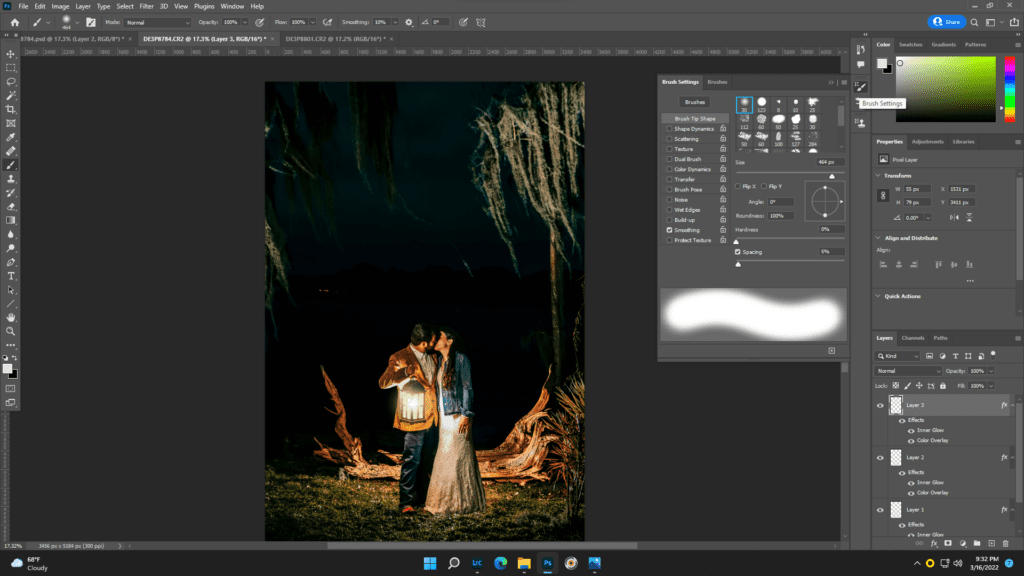
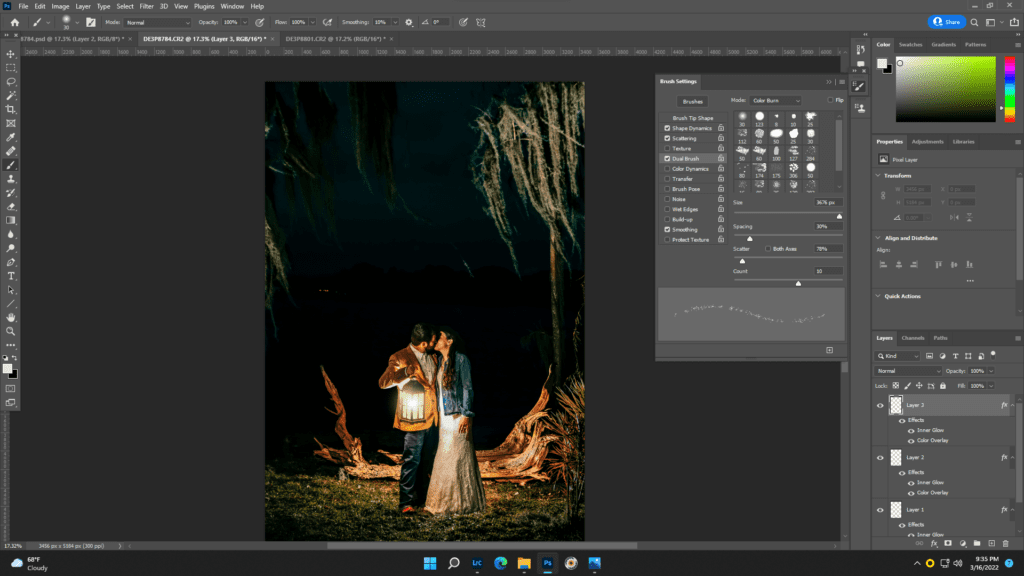
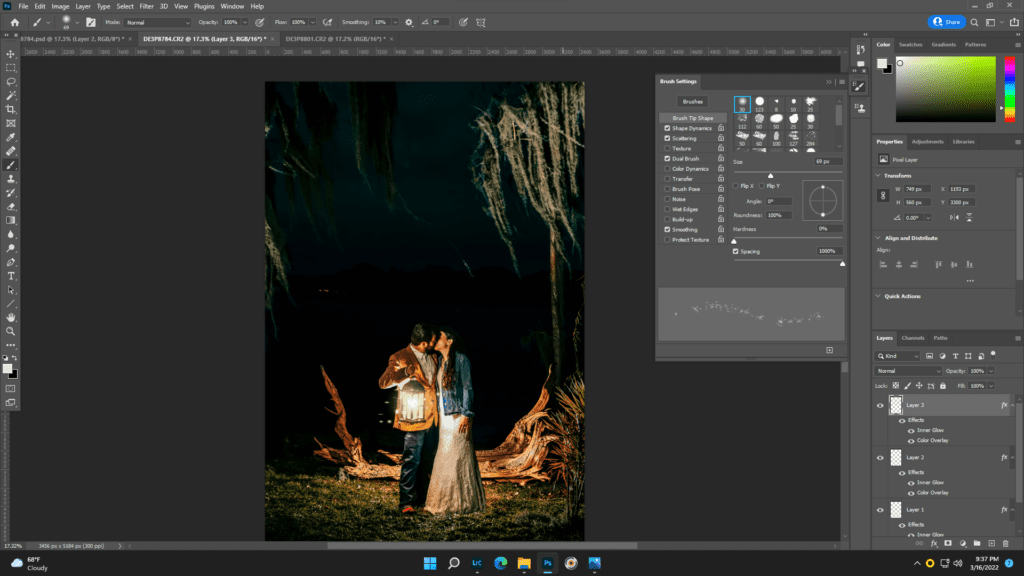
13. I then utilized the following settings to create a scatter brush to create the fireflies in the final image.

As seen above, editing, especially composite images, can be a time-consuming and artistic venture. However, they create some beautiful photos. I would advise my brides that “you get what you pay for.” In other words, keep in mind that photography prices frequently account for the amount of editing that occurs after your session. This one image took approximately forty minutes to create and a typical gallery consists of 300-400 images. Not all images are going to be as heavily edited. However, it does explain why some galleries will take longer to complete. Interested in getting a composite image of your own? Contact me to set up your free consultation.